Sean Lee
Student | Game Programmer

Remember Me (2021)
Personal Project - Game Jam

Summary
This was my entry into my first game jam (Zeno Jam 4 2021) where I placed 7th overall out of the 80 entries. Based on the jam’s theme “I Am Everywhere,” I created a top-down 2D arcade shooter where the player races across the city sticking posters in order to honour their best friend’s dying wish of been known everywhere.
My main motivation for participating in the jam was to assess my current game development and programming skills, as well as my ability to appropriately scope projects and manage my time in a pressurised environment.
Goals
-
Create a game around the jam’s theme: “I Am Everywhere”
-
Practice project scoping and time management
-
Evaluate current game development and programming skills
-
Further develop game development and programming skills


Specifications
-
Platform: Web
-
Project Duration: 3 days +1 week polish
-
Genre: Arcade Shooter, Top-down, 2D, Pixel art
Game Design
Vision
As this was my first game jam, I thought that it would be best to create an arcade shooter as the core conventions of the genre, such as time limits, would enable me to more easily create a game that would feel complete.
I wanted to focus on incorporating fast-paced gameplay to emphasise the importance of the player’s mission in the lore of the game, as well as to invoke the feeling of racing through the city and slapping posters onto the things you pass by. As such, incorporating a run-and-gun style of play was important to fulfilling this design goal, as well as imposing a time limit. Additionally, there was a focus on this type of gameplay in order to maintain the player’s engagement, as otherwise a slower game with the same mechanics may not be sufficient to keep the player entertained.
Posters and Eggs
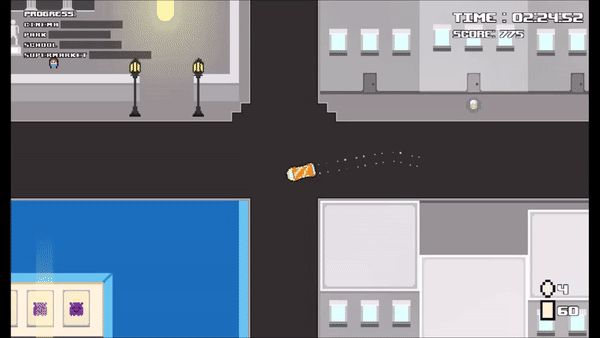
The player’s primary interactions are shooting posters using a high-powered poster gun and throwing eggs at those who try to take your posters down.
The poster gun was implemented mostly for flavour and to align with the original design goal. I felt that it would be more exciting for the player to be able to run by a row of shops and spray them down with posters rather than putting them up one by one.

Player's poster gun in action
The poster gun itself was implemented as its own object that would spawn a poster projectile in the direction of the player’s mouse when triggered.
The eggs were implemented to provide a way for the player to temporarily delay the poster remover enemies from taking down their posters while they returned home to restock their ammo. I felt that it might be unfair to have the AI impede on the player’s progress without any other way to stop them besides clearing the area faster.

Player's egg throwing ability
The eggs were implemented in a similar manner to the poster gun, and the stun effect was handled by the enemies themselves when they detect that an egg has hit them (the enemies determined what happened to them when hit by a projectile).
Why a Car?
The player can drive a car within the game to reach the areas in which they need to stick posters to, and to quickly return home to restock their posters. As the playable map is fairly large, the player needed a way to efficiently get around in order to maintain the fast-paced gameplay I envisioned, and given the city setting, a car seemed the most appropriate.
Player restocking posters
In retrospect, it was not the best idea to constantly have the player backtrack to the other side of the map just to restore their ammo. While I intended for it to add to the time pressure of the game, the constant back and forth between the same areas made it a bit of a chore and detracted from the overall experience.
I did have to follow a tutorial to be able to learn how to implement the appropriate movement for a car due to my lack of experience, however the interaction of the player entering and exiting the car was of my own design. This behaviour was achieved by using an Area2D node around the car to detect when the player was nearby, which would then allow them to enter the car by pressing the ‘E’ key. The player character would then be hidden, and its input disabled, while the car’s input would be enabled. The opposite actions would be performed when the player exited the car.
It's Time to Power Up!
To create more variety in the gameplay, and to provide the player with some additional tools to be able to complete the game within the time limit, some power ups were implemented. These power ups were placed at fixed locations in finite amounts to add to the game’s strategy so the player not only had to consider the order in which to complete the areas, but also how to best utilise the power ups.
The following power ups were included:
-
Temporarily increase in movement speed (allowing the player to walk between locations faster)
Movement speed power up
-
Additional posters (providing the player with a few extra posters)
Additional posters power up
-
Temporarily shoot three posters at a time (to speed up the process of clearing areas)

Multi-shot power up
The implementation of the power ups was fairly simple when utilising Godot’s Area2D node. A simple signal connection to determine when the player walks over the power up was all that was required in addition to the effects applied to the player.
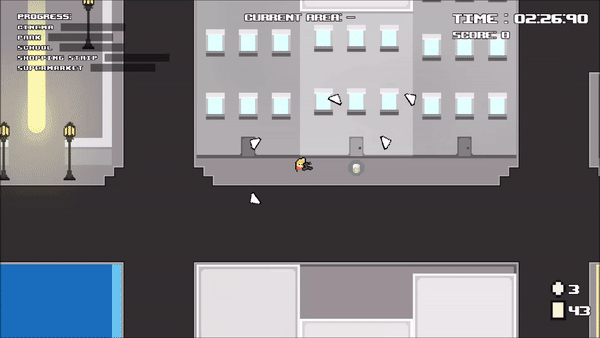
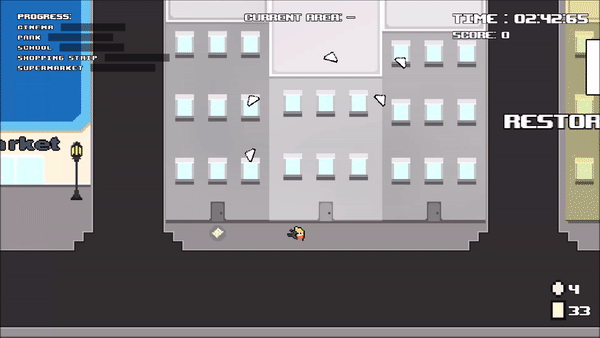
Streamlining Playable Area Creation
Each area within the game has its own set of objects that need to be covered by posters, and each object the player clears will contribute to the completion of that area. As each area has a varying number of objects, I needed a way to more efficiently set them up without having to manually set references to each object inside them.
This led to the creation of a new component that utilised Godot’s Area2D node to be able to get all the references to the objects that overlapped with it as an array. To eliminate the need to filter for the right objects, I reused the collision mask that the player’s poster projectiles used to detect posterable objects so the Area2D node only returned the relevant references. By using the collision mask, it saved me from needing to add another variable to determine the type of an object, or needing to create a new group to add the posterable objects to.

Posterable area set up in editor
Posterable area in-game
Once I was able to obtain these references, I could assign them to the relevant area to allow it to track the number of objects that have been fully covered by the player, and hence determine how close the player was to completing that specific area.
I did not use this method to get references to the actual areas themselves however as that would result in needing to use an excessively large Area2D. Additionally, there were far fewer areas compared to posterable objects in my game. Instead, I manually set a reference to each area via an exposed variable in a level manager node, which I felt was the most appropriate to allow the level manager to handle connecting the update signals for the area’s completion to the player’s UI. This method of assigning the areas also enabled me to dynamically instance the progress bars used to track the progress the player was making for a particular area, as well as to be able to test areas individually.
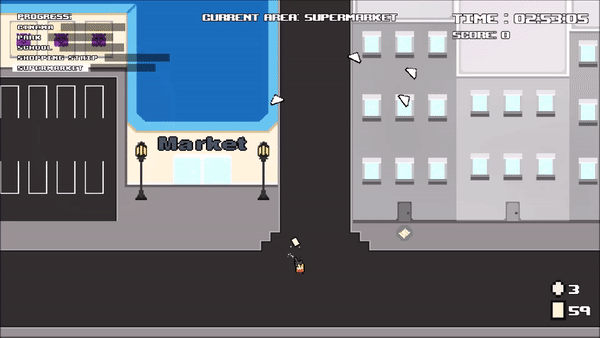
UI Design
Core Focus
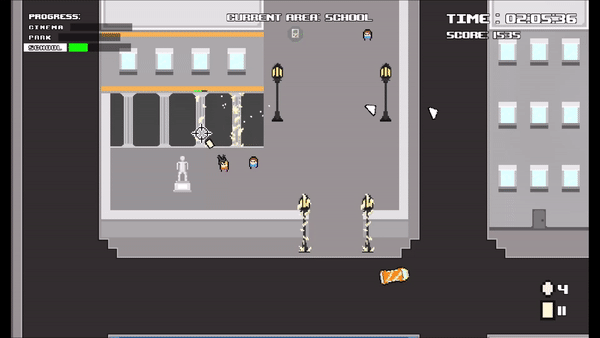
Due to the fast-paced vision I had for the game, I knew that a simplistic UI was required to minimise distractions to allow the player to remain focused. As such, UI elements were kept to a minimum and only conveyed what was necessary such as: the current progress of areas, current score, time remaining, current ammo, and indicators directing players to unclear locations.

Game UI
What's The Progress?
To indicate how covered a posterable object was, a small progress bar would appear above an object which essentially acted as its health bar. This was further supported by having the object’s sprite change.

Posterable object progress
In addition to the smaller progress bars on the posterable objects, indicating whether it was fully covered by posters or not, I decided to also add an overall indicator for the completion of the different areas. This served to provide the player with more information regarding how many objects they needed to cover, as well as how fast they were clearing the area.

Posterable area progress indicator
As mentioned before, the progress bars for the overall areas were instanced dynamically through the level manager so the appropriate signals could be connected to allow the UI to function properly. Once each area has been completed, the corresponding progress bar was removed to declutter the player UI.
Reflection
Overall, I was happy with how I performed during the game jam considering it was my first, and it was a great opportunity to really put my skills to the test. Surprisingly, the time constraints actually made things more fun, and I was able to learn a lot in short period of time both about game development and how I personally work.
From this experience, some things I would do differently or keep in mind for future projects include:
-
Spending more time in preproduction to ensure I develop a clearer image of how the game’s systems interact with each other and to fully validate my ideas before implementing them
-
Avoid forcing the player to repeatedly backtrack too much within a short period of time to prevent parts of the game from feeling like a chore
-
Tying the game to the jam’s theme through its mechanics rather than just through its story